Adding an overlay to OBS is one of those things that sounds technical until you actually do it - then you realize it takes about five minutes. If you've just downloaded an overlay pack (or you're about to) and you're staring at OBS wondering where everything goes, this guide walks you through the whole thing, step by step, no jargon.
By the end, your Starting Soon screen, alerts, webcam frame and panels will all be live on your stream, looking like a channel that's been around for years.
Let's get into it.
What you'll need before you start
You don't need much, but a couple of things make this painless:
- OBS Studio (free) installed and updated. Streamlabs and StreamElements work too - the steps are nearly identical.
- An overlay pack unzipped into a folder you'll remember. Most packs come as PNG images, looping MP4 or WebM animations, and sometimes alert files. If you don't have one yet, grab a free overlay pack to follow along - it's a great way to test your setup before buying.
- Five minutes. Seriously, that's it.
A quick tip before you start: create one folder called something like MyStreamOverlay and drop every file from your pack inside it. Keeping everything in one place will save you a lot of clicking later.
Step 1 - Set up your Scenes
Think of Scenes as the different "views" of your stream. Most streamers use at least four:
- Starting Soon - what viewers see before you go live
- Live / Gameplay - your main scene while streaming
- Be Right Back - for quick breaks
- Stream Ending - your outro
In OBS, look at the Scenes box (bottom-left). Click the + button and create a scene for each one. Name them clearly - future-you will thank you.
If your overlay pack is built as a complete set (like most of ours), you'll have a matching animated screen for each of these. That's the whole point of a themed pack: everything already matches, so you're not stitching together random elements.
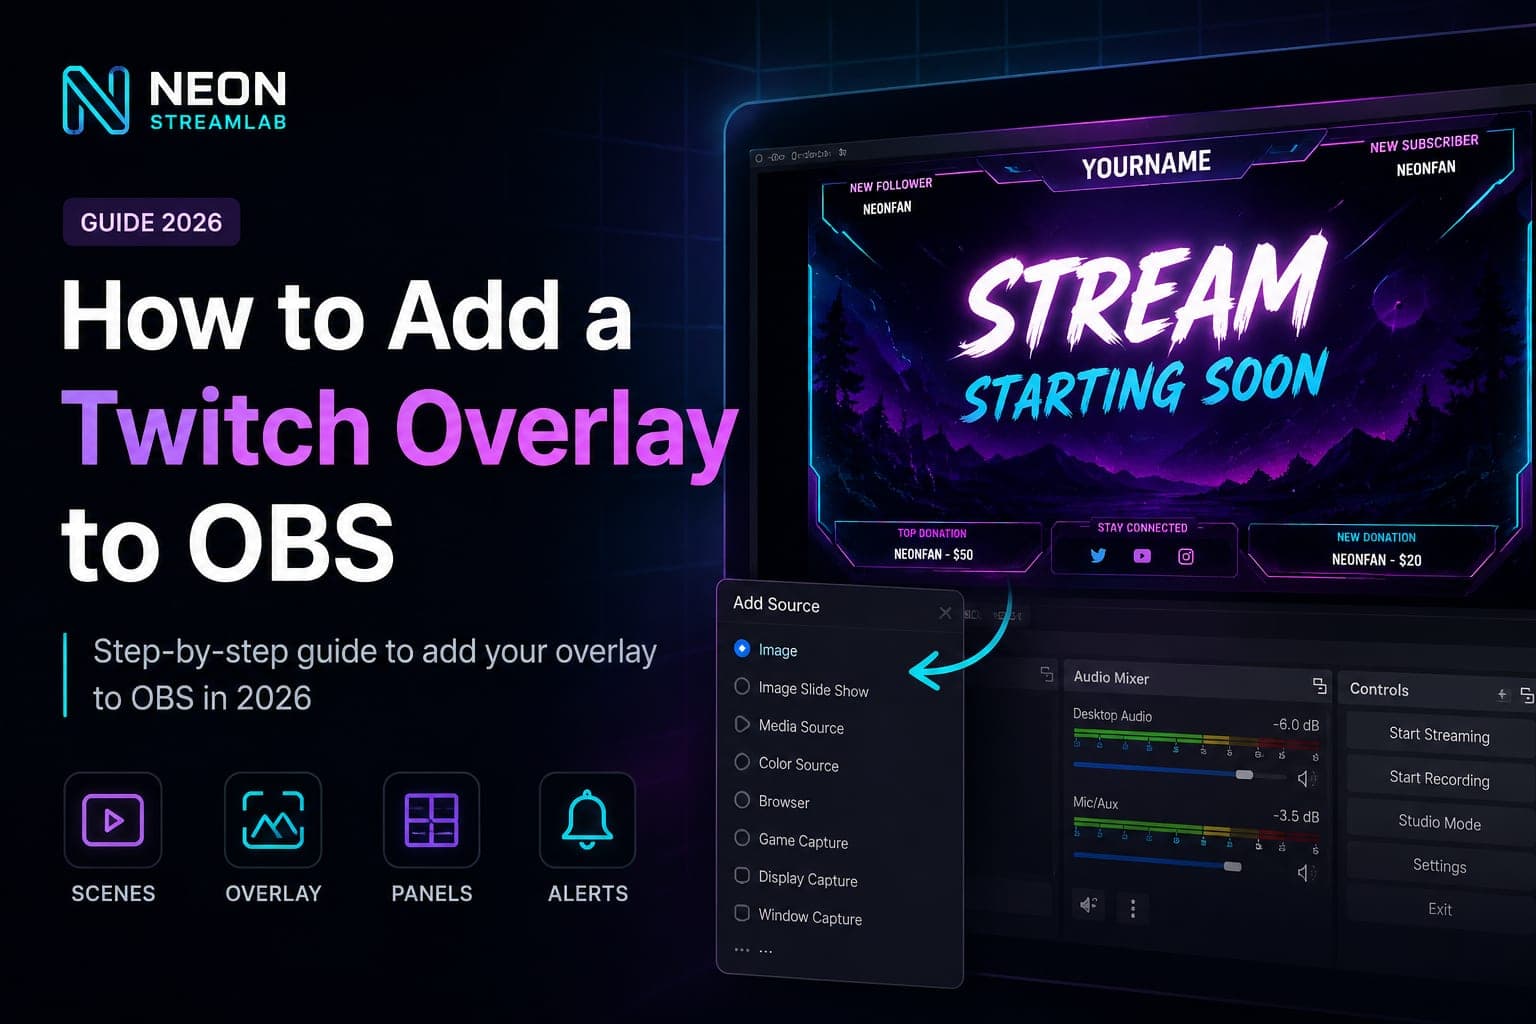
Step 2 - Add your animated screens
Now let's bring in the visuals. Click on your Starting Soon scene, then in the Sources box click +.
- For an animated screen (MP4 or WebM), choose Media Source.
- For a static image (PNG), choose Image.
Browse to your overlay folder, pick the right file, and hit OK. It'll drop onto your canvas.
For looping animations, make sure to check the Loop box in the Media Source settings - otherwise your Starting Soon screen will play once and freeze. You'll also usually want to uncheck "Restart playback when source becomes active" only if you want it to continue rather than restart; for most starting screens, leaving the defaults is fine.
Repeat this for each scene: the Be Right Back screen in your BRB scene, the Ending screen in your outro scene, and so on.
Step 3 - Resize and position everything
Your screen probably won't fill the canvas perfectly at first. No problem.
Click the source, and you'll see red handles around it. Drag the corners to resize. To make it fill the screen perfectly, right-click the source → Transform → Fit to screen (or press Ctrl+F). Done - pixel-perfect, every time.
A standard stream canvas is 1920×1080. Good overlay packs are designed at exactly this resolution, so they snap into place cleanly without stretching or blurring. If your overlay looks soft or pixelated, double-check that you're working at 1080p in Settings → Video.